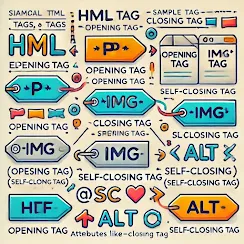
Welcome back to our HTML tutorial series! In this blog, we’ll dive deeper into the building blocks of HTML: elements, tags, and attributes. By the end of this lesson, you’ll have a solid understanding of these concepts and how to use them effectively to create richer web pages.
What Are HTML Elements?
An HTML element is the basic building block of an HTML document. It represents a part of the content or structure on a webpage, such as a paragraph, a heading, or an image.
Example of an HTML Element:
<p>This is a paragraph element.</p>
Structure of an Element:
- Opening tag:
<p> - Content:
This is a paragraph element. - Closing tag:
</p>
Together, these three parts make up an HTML element.
What Are HTML Tags?
An HTML tag is the code that defines the beginning and end of an element. Tags are enclosed in angle brackets (<>).
Types of Tags:
- Opening tags: Marks the start of an element (e.g.,
<h1>). - Closing tags: Marks the end of an element (e.g.,
</h1>).
Some elements, like <img>, are self-closing tags and do not require a closing tag.
Example of Tags:
<h1>This is a heading</h1>
<img src="image.jpg" alt="A sample image">
<h1>and</h1>are opening and closing tags for a heading element.<img>is a self-closing tag for an image element.
What Are Attributes?
Attributes provide additional information about an element. They are always written in the opening tag and consist of a name and a value.
Attribute Syntax:
<tagname attribute="value">Content</tagname>
Example of an Attribute:
<a href="https://example.com">Visit Example</a>
In this example:
- The tag is
<a>(used to create a hyperlink). - The attribute is
href, which specifies the link's destination. - The value of the
hrefattribute ishttps://example.com.
Commonly Used Attributes:
href: Defines the URL for links (<a>tag).src: Specifies the source of an image or media file (<img>tag).alt: Provides alternative text for images (<img>tag).id: Assigns a unique identifier to an element.class: Groups elements for styling or scripting.
Practical Examples
Example 1: Adding a Link
<a href="https://www.google.com" target="_blank">Go to Google</a>
href: The URL to visit.target="_blank": Opens the link in a new tab.
Example 2: Displaying an Image
<img src="nature.jpg" alt="Beautiful nature" width="300" height="200">
src: The path to the image file.alt: Describes the image (useful for accessibility).widthandheight: Specify the dimensions of the image.
Example 3: Styling with Classes
<p class="highlight">This is a highlighted paragraph.</p>
The class attribute allows us to apply CSS styles to the paragraph.
Best Practices for Using Tags and Attributes
- Always close your tags: Even if they’re optional (e.g.,
<p>), it’s a good habit. - Use meaningful attributes: For example, always add
alttext to images for better accessibility. - Keep it organized: Properly indent and structure your HTML for readability.
Challenge: Try It Yourself
- Create a hyperlink that opens your favorite website in a new tab.
- Add an image to your HTML file with proper
alttext and dimensions. - Use the
idattribute to assign a unique identifier to a heading.
Recap
In this blog, we covered:
- What elements, tags, and attributes are.
- The structure of an HTML element.
- How to use attributes to add extra functionality to elements.
In the next blog, we’ll explore text formatting and styling to make your web pages more visually appealing.
Stay tuned and happy coding!
click here to visit previous tutorial blog.
click here to visit next tutorial blog.

%20(1).png)


%20and%20an%20unordered%20list%20(_ul_),%20each%20with%20.webp)
.jpg)

0 Comments